
自动化部署hexo博客到GitHub page/使用使用 GitHub Actions

自动化部署hexo博客到GitHub page/使用使用 GitHub Actions
AkFace自动化部署 hexo 博客到 GitHub page/使用使用 GitHub Actions
- 这样做的目的是,以后写文章只需专注写 markdown 文件即可,写完直接提交代码 push 到 GitHub,就会自动构建发布,省去了本地环境搭建和
hexo clean && hexo deploy
1、GitHub 仓库
- 在 GitHub 上创建博客仓库,仓库名:userName.github.io,比如我的:
akFace.github.io用来存储静博客态文件 - 安装 hexo 【此步骤可以先按这个教程来建立自己的 hexo 博客】
- 创建一个私有仓库名:Blogs(如果不想私有也可以共用
userName.github.io仓库来存 hexo 源码,记得切个分支)用来存 hexo 的源码,上一步安装好的 hexo - 以下存储静态文件仓库名:
userName.github.io就称为prod,存储 hexo 源码的仓库名:Blogs,就叫dev
2、设置 GitHub Action
- 为了确保 GitHub Actions 能够推送代码到目标仓库,需要在 GitHub 仓库的设置中添加密钥。
- 首先在你本机生成密钥对:
1 | ssh-keygen -f github-deploy-key |
一路回车下去,当前目录下就会生成 github-deploy-key 和 github-deploy-key.pub 两个文件,可以用文本编辑器打开,复制里边的内容。
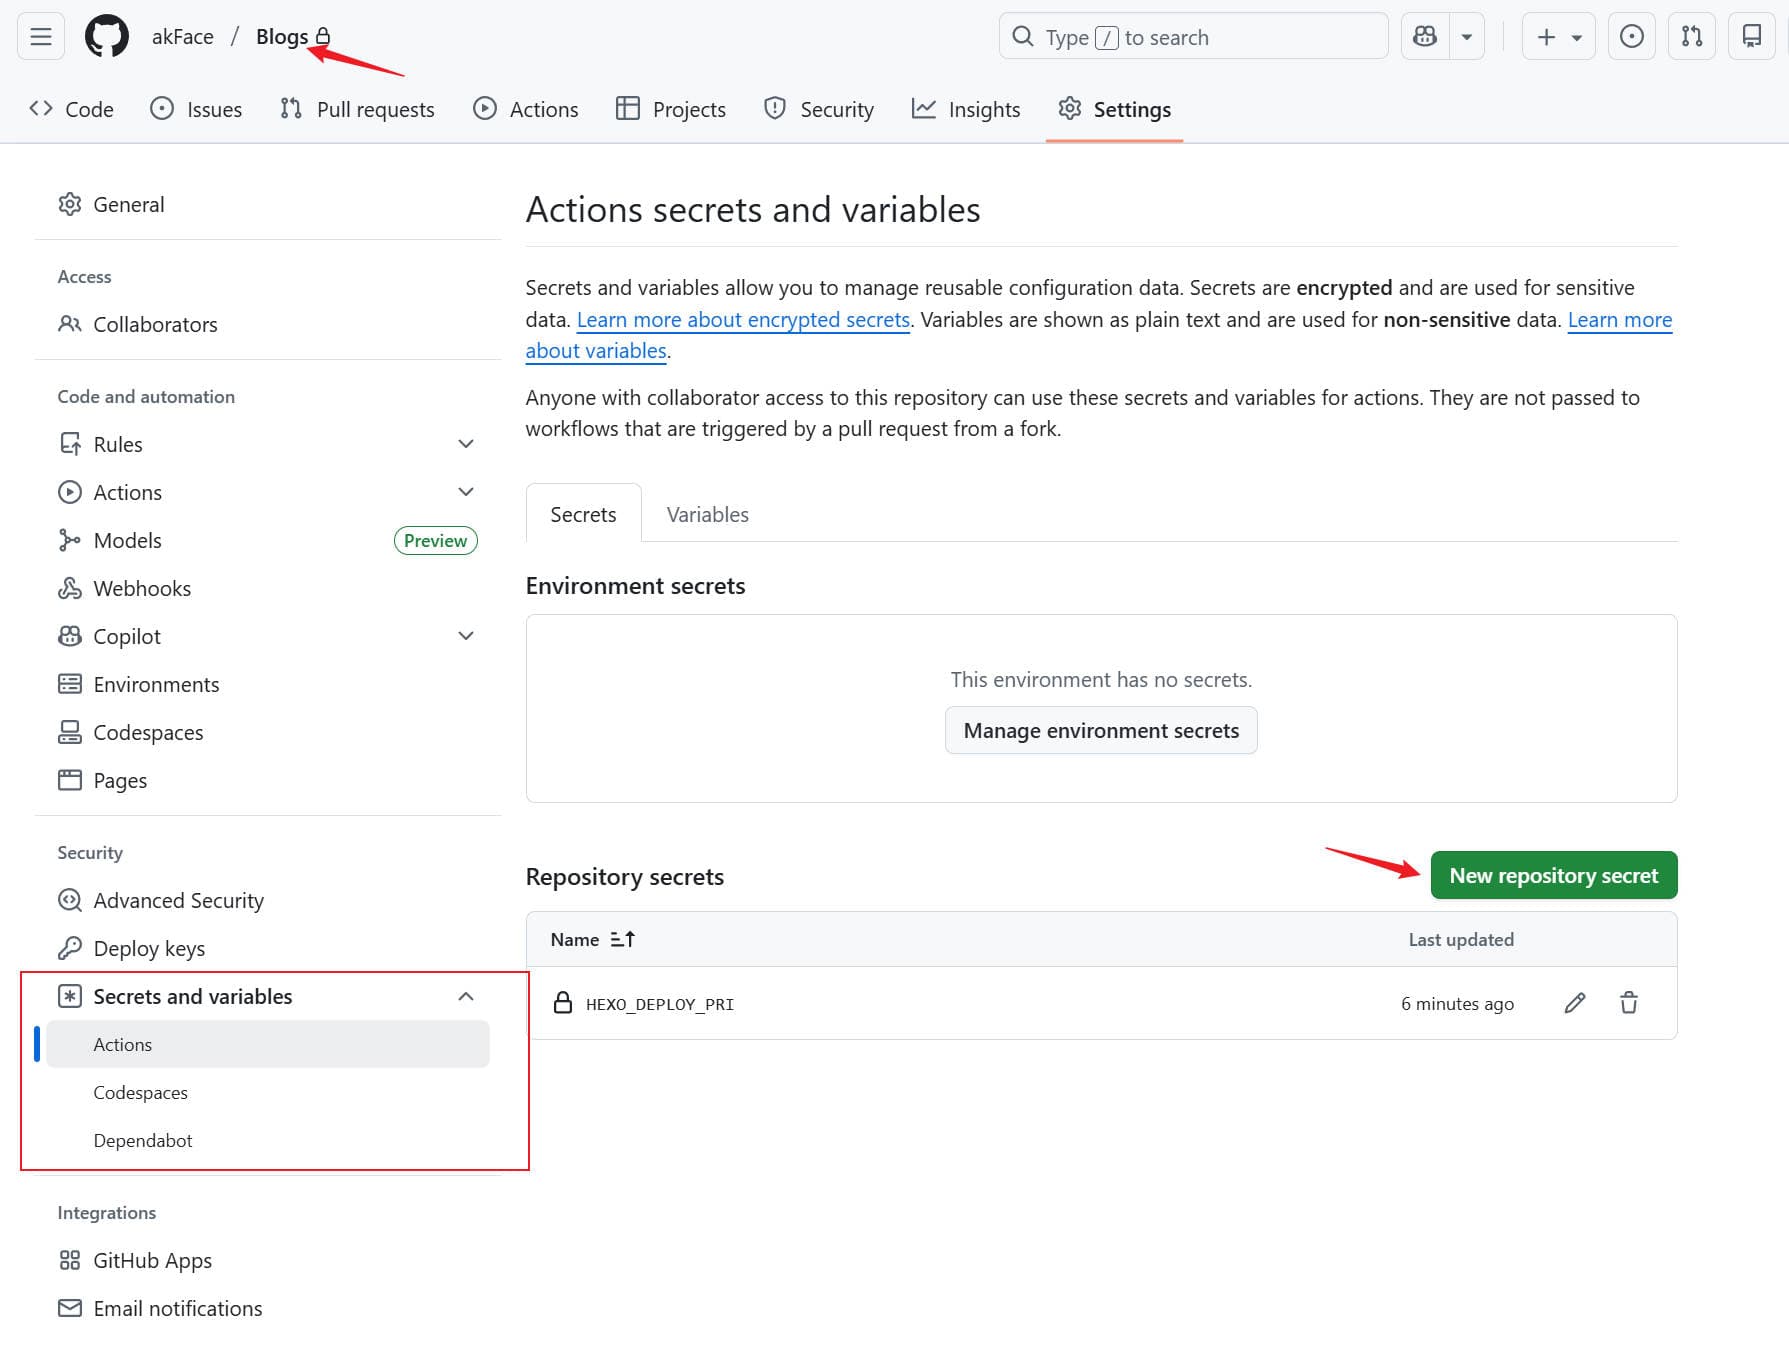
- ① 进入
dev仓库中-进入仓库页面 → Settings → Secrets and variables → actions → New repository secret,Name 填HEXO_DEPLOY_PRI,Secret 填 github-deploy-key 的内容。
-② 对于 prod 仓库:进入仓库页面 → Settings → Deploy keys → Add deploy key,Title 填 HEXO_DEPLOY_PUB ,Key 填 github-deploy-key.pub 的内容。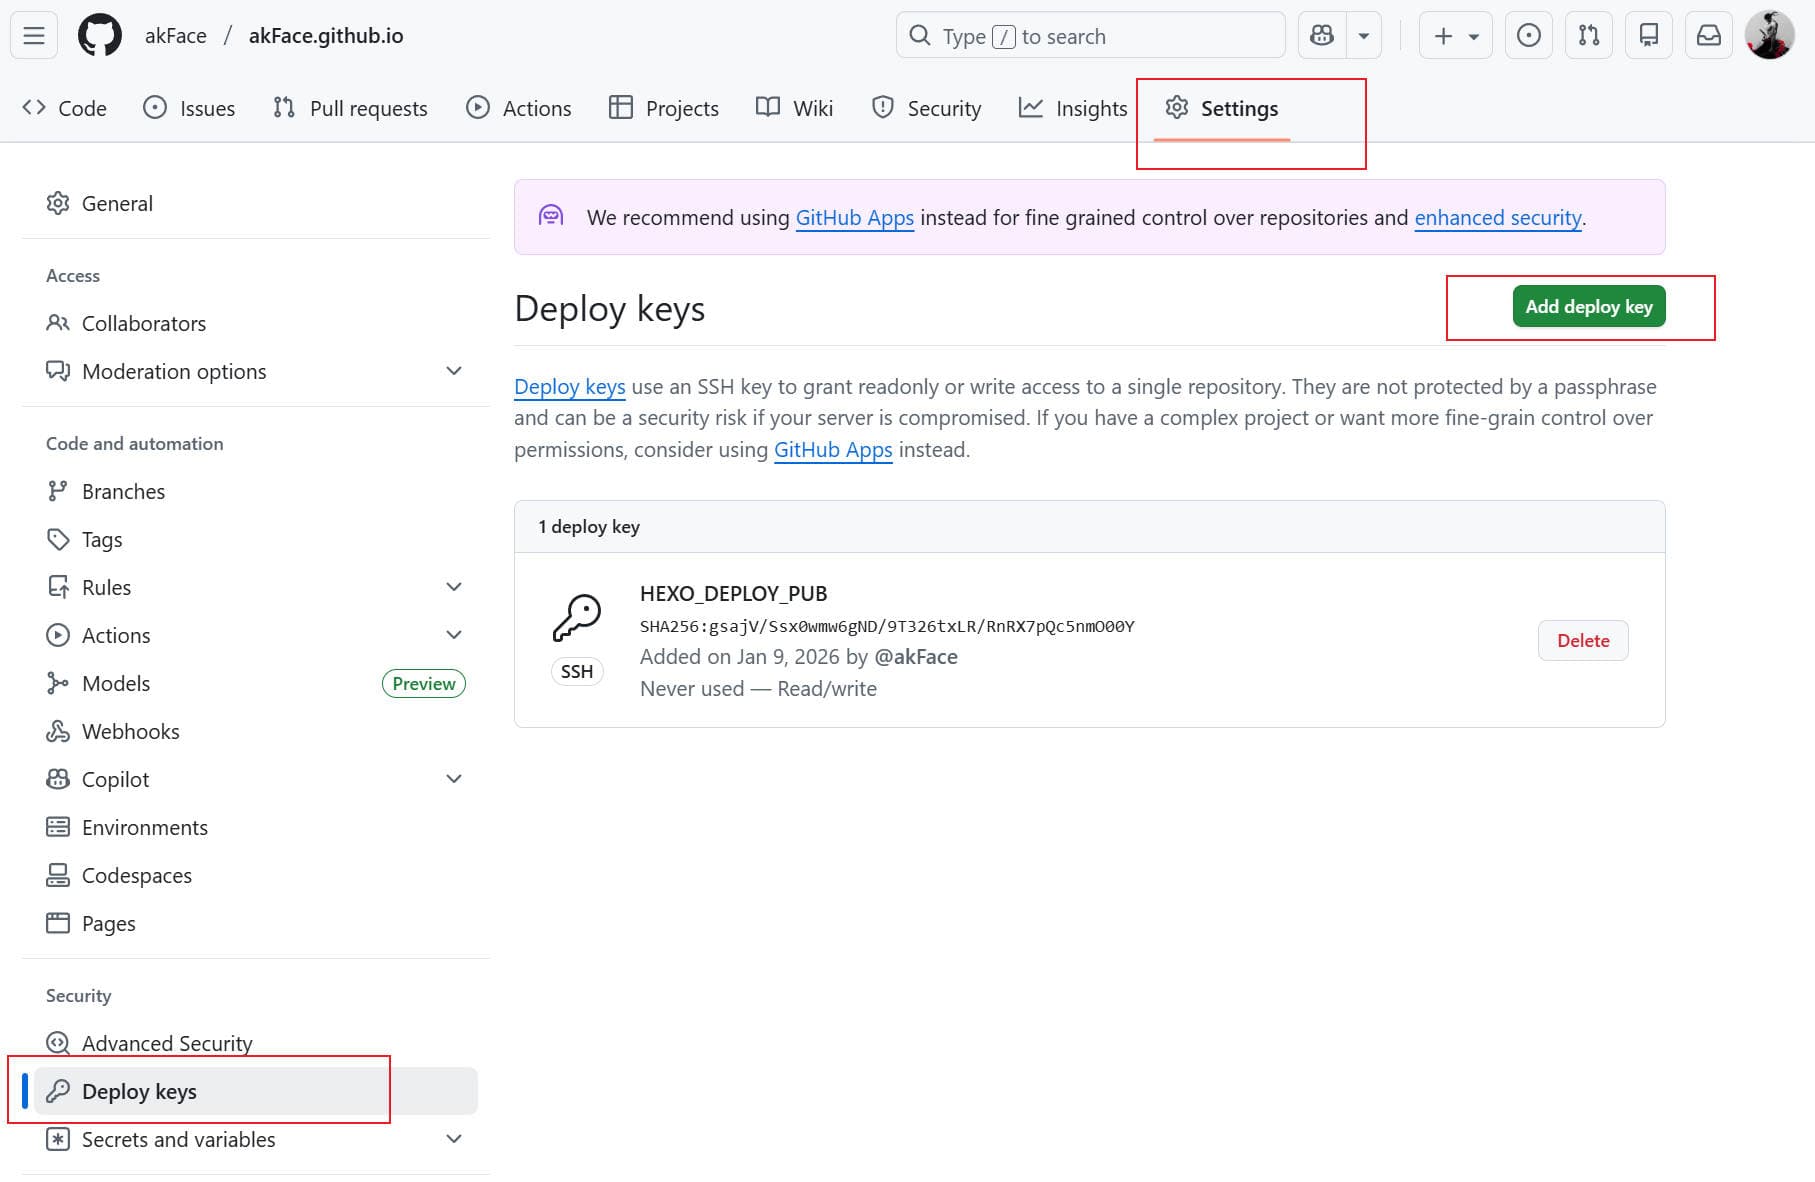
配置 Action 文件
- 以下是完整的 GitHub Actions 配置文件(没有可自行创建),将这个完整的配置文件保存到 dev 仓库下的 .github/workflows/deploy.yml 即可:
1 | name: Deploy hexo blog |
以下这两项需要改成自己的 GitHub 名称和绑定的邮箱
1 | git config --global user.name "akFace" |
- 最后 SSH 密钥。你也可以选择使用 PAT(Personal Access Token)来进行验证。我看大多数都是用 ssh 进行提交。注意如果你选择 ssh,而之前你部署的时候使用的是 http,那么你需要修改 dev 目录下
_config.yml中的 deploy 字段中的 repo,改为 ssh 地址,即:
1 | # 原来是: |
到此结束
- 可以 push 代码到 GitHub 验证效果了
常见问题
- 有些因为主题无法运行的问题
- 修改
deploy.yml文件,添加以下安装主题依赖cd themes/主题名称/ npm ci
1 | # 安装依赖 |
- 因
package-lock.json问题无法构建
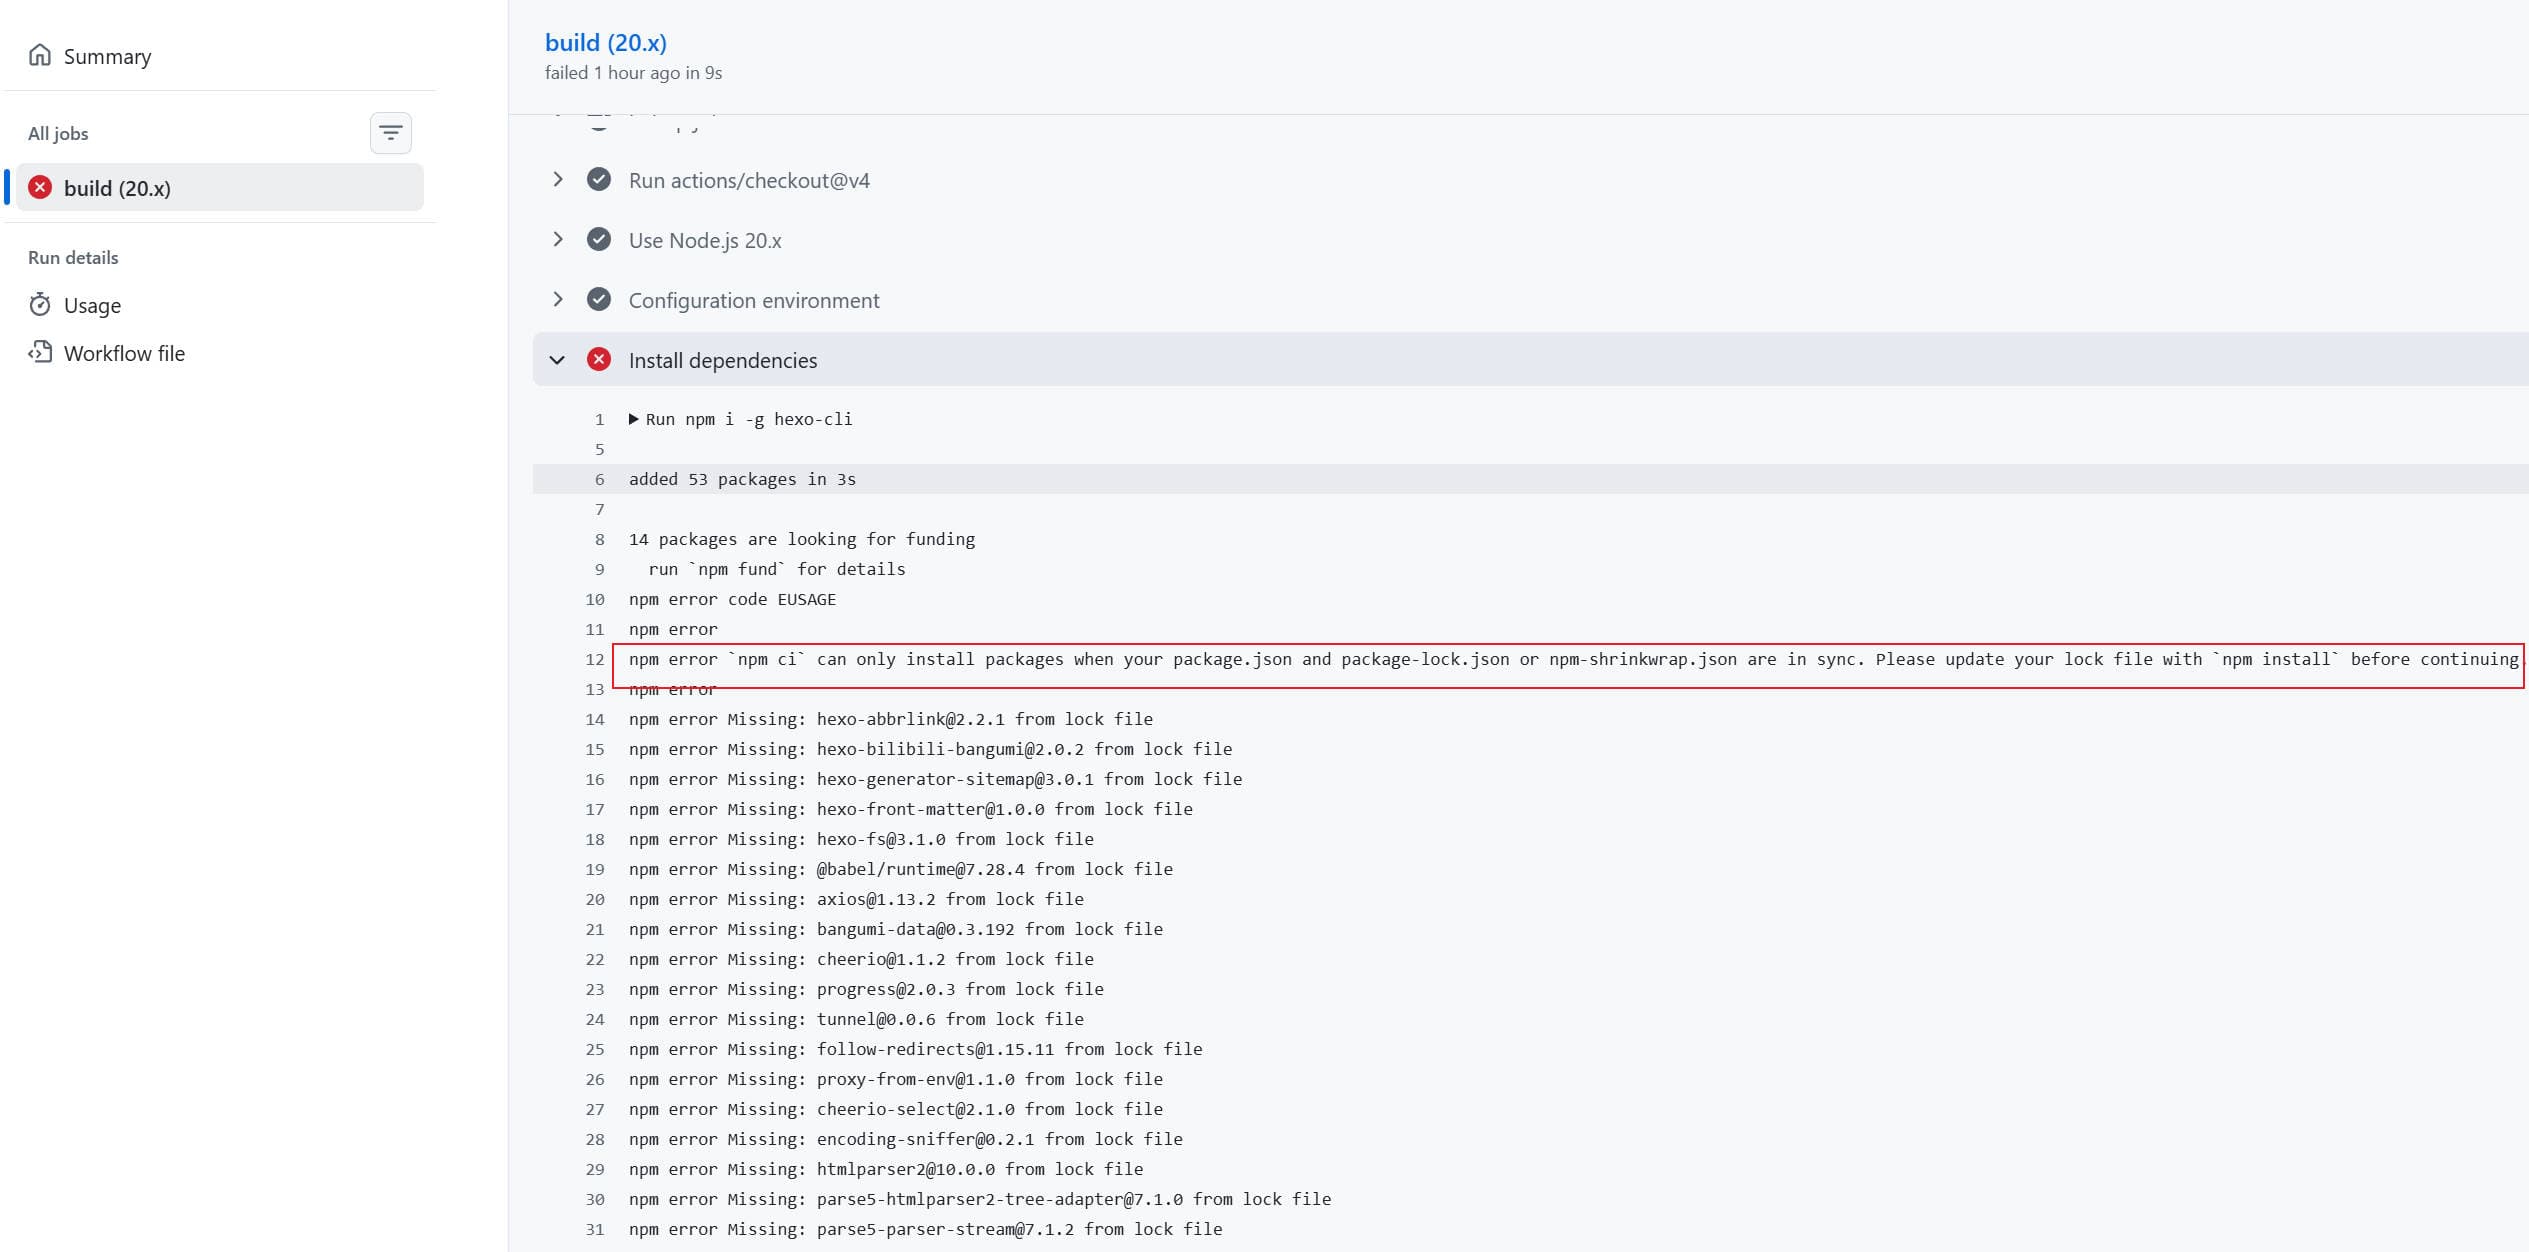
清除并重建 package-lock.json
在使用 npm 管理依赖时,package-lock.json 用于锁定依赖版本,确保安装一致性。当出现依赖冲突、版本错乱或升级失败时,可以通过清除并重建该文件来解决问题。
操作步骤
① 删除锁文件与依赖目录
1 | rm package-lock.json |
建议同时删除 node_modules,避免旧版本依赖残留导致新锁文件与实际安装不一致。
② 清理 npm 缓存(可选)
1 | npm cache clean --force |
③ 重新安装依赖并生成新锁文件
1 | npm install |
④ 重新推送到 GitHub


评论
匿名评论隐私政策

最近发布